
Showing posts with label Database. Show all posts
Showing posts with label Database. Show all posts
Thursday, May 1, 2025
Automate Resume Screening with TAOne.AI | Fast & Smart Talent Filtering Process 500+ Resumes in Hour
Thursday, January 2, 2025
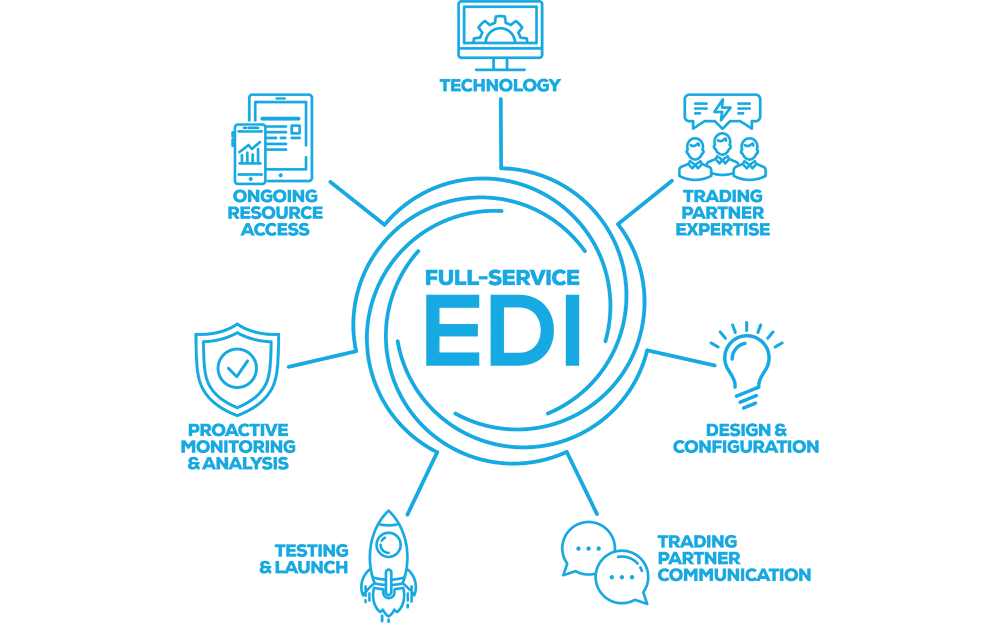
Implementing EDI Integration Using Microsoft Azure Logic Apps
.png)
# Implementing EDI Integration Using Microsoft Azure Logic Apps
This comprehensive guide provides a step-by-step approach to implementing EDI (Electronic Data Interchange) integration using Microsoft Azure Logic Apps. Azure Logic Apps is a cloud-based service designed to help automate workflows and integrate EDI transactions seamlessly with your systems and trading partners.
---
## **Step 1: Prerequisites** Before starting the implementation, ensure you have the following:
1. **Azure Subscription**: - Sign up for an Azure account if you don’t already have one. - Access the Azure Portal.
2. **Trading Partner EDI Specifications**: - Obtain the EDI implementation guide for the documents you will exchange (e.g., EDI 810, EDI 850).
3. **Existing Systems**: - Identify the systems (e.g., ERP, CRM) that will integrate with EDI workflows.
4. **Data Format**: - Define the data format (e.g., X12, EDIFACT, XML) based on trading partner requirements.
---
## **Step 2: Create a Logic App** 1. **Log in to Azure Portal**: - Navigate to the Azure portal and search for "Logic Apps."
2. **Create a New Logic App**: - Click "Create" and provide the following details: - **Resource Group**: Create or select an existing resource group. - **Name**: Name your Logic App (e.g., `EDI_Integration_Workflow`). - **Region**: Select the appropriate region for hosting.
3. **Open Logic App Designer**: - Open the Logic App in Designer mode to start building your workflow.
---
## **Step 3: Add EDI Integration Connector** Azure provides built-in connectors for EDI transactions, such as AS2, X12, and EDIFACT.
### **For X12 EDI** 1. **Set Up an Integration Account**: - Navigate to "Integration Accounts" in the Azure portal. - Create an Integration Account and link it to your Logic App.
2. **Upload Partner Agreements**: - Define trading partners and upload their details (e.g., X12 schemas, certificates, and agreements) into the Integration Account. - Add: - **Schemas**: Import X12 schema files for the EDI document types you are processing. - **Partners**: Add trading partner details (identifiers, roles, and agreements). - **Agreements**: Configure inbound and outbound agreements specifying EDI protocols and settings.
3. **Configure X12 Connector**: - In the Logic App Designer, search for "EDI X12" and add the X12 connector. - Choose "Receive X12 Message" or "Send X12 Message" based on the workflow.
---
## **Step 4: Design the Workflow**
### **Inbound EDI Workflow** 1. **Receive EDI Document**: - Add a trigger to start the Logic App, such as "When a file is added to Azure Blob Storage" or "Receive AS2 message."
2. **Decode EDI Message**: - Use the "EDI Decode" action to validate and parse the received EDI document. - Map the EDI segments to readable data (e.g., JSON, XML).
3. **Transform Data**: - Add a "Transform XML" action to convert the EDI message into the desired format for your system. - Use a predefined map or create one using Azure’s mapping tools.
4. **Send Data to System**: - Add an action to send the transformed data to your internal system (e.g., SQL Database, Dynamics 365).
### **Outbound EDI Workflow** 1. **Receive Data from System**: - Add a trigger to listen for new data in your system (e.g., "When an item is created in SQL Database").
2. **Transform Data**: - Use the "Transform XML" action to convert internal data into the required EDI format.
3. **Encode EDI Message**: - Use the "EDI Encode" action to package the data into an X12-compliant EDI document.
4. **Send EDI Document**: - Add an action to send the EDI document to the trading partner via AS2, FTP, or another protocol.
---
## **Step 5: Test the Integration** 1. **Enable Logging**: - Use Azure Monitor or Application Insights to track the execution of your Logic App.
2. **Perform Test Runs**: - Simulate inbound and outbound transactions using test data. - Verify that the EDI documents are generated, validated, and transmitted correctly.
3. **Fix Errors**: - Debug any errors using the Logic App’s run history and logs.
---
## **Step 6: Go Live** 1. **Deploy the Logic App**: - Ensure all configurations are in place and move the Logic App to production.
2. **Monitor Live Transactions**: - Use Azure’s monitoring tools to ensure smooth operation and address any issues promptly.
---
## **Step 7: Maintain and Optimize** 1. **Periodic Reviews**: - Review workflows to ensure compliance with updated trading partner requirements.
2. **Optimize Performance**: - Monitor latency and throughput, and adjust Logic App triggers and actions as needed.
3. **Add New Partners**: - Scale your solution by adding new trading partners or EDI document types.
---
By following this detailed roadmap for implementing EDI integration using Azure Logic Apps, you can streamline your business processes, ensure compliance with trading partner requirements, and achieve efficient and reliable electronic data exchange.
Friday, December 27, 2024
Implementing the EDI 810 (Invoice) document in SPS Commerce

Implementing the EDI 810 (Invoice) document in SPS Commerce involves configuring the tool to map, transmit, and validate the EDI data according to trading partner requirements. Here’s a step-by-step guide:
---
### **Step 1: Gather Requirements**
1. **Understand Trading Partner Specifications**: Obtain the 810 EDI Implementation Guide (specifications) from your trading partner.
- Identify required segments, elements, and codes.
- Understand any validation rules or business-specific requirements.
2. **Define Business Rules**: Work with internal teams to outline the invoicing data flow and confirm all necessary data points are captured.
---
### **Step 2: Configure SPS Commerce Tool**
1. **Log in to SPS Commerce Fulfillment**:
- Access the web portal or integration tool provided by SPS Commerce.
- Ensure you have administrative privileges to configure document settings.
2. **Set Up Trading Partner Connection**:
- Navigate to the "Connections" or "Trading Partner Setup" section.
- Add or update the trading partner's profile to enable the 810 document type.
3. **Enable EDI 810 Document**:
- Locate the document setup menu for the trading partner.
- Select "810 Invoice" and ensure it is enabled.
4. **Map Data Fields**:
- Use SPS Commerce’s mapping tools to map your internal data (ERP or accounting system) to the 810 format.
- Map mandatory segments like **ST (Transaction Set Header)**, **BIG (Beginning Segment for Invoice)**, **N1 (Name)**, **IT1 (Invoice Line Items)**, and **TDS (Total Monetary Value Summary)**.
5. **Validate Mapping**:
- Perform test mapping for various scenarios (e.g., single item, multiple items, taxes, discounts).
- Ensure all required segments are mapped and optional ones are handled based on trading partner preferences.
---
### **Step 3: Test the Implementation**
1. **Generate a Test Invoice**:
- Create a sample invoice in your internal system.
- Export it to SPS Commerce.
2. **Run Mapping Validation**:
- Verify the data is translated into the correct EDI 810 format.
- Check the structure, syntax, and compliance with the trading partner’s specifications.
3. **Send Test EDI File**:
- Use the testing environment provided by SPS Commerce to transmit the 810 document to your trading partner. - Work with the trading partner to validate and troubleshoot any issues.
---
### **Step 4: Go Live**
1. **Confirm Trading Partner Approval**:
- After successful testing, obtain trading partner approval to go live.
2. **Enable Production Mode**:
- Switch the EDI 810 configuration from the test environment to production.
3. **Monitor Initial Transactions**:
- Closely monitor the first few live transactions for errors or discrepancies.
- Use SPS Commerce’s monitoring tools for error alerts and transaction tracking.
---
### **Step 5: Maintain and Update**
1. **Periodic Reviews**:
- Regularly review and update mappings to accommodate any trading partner updates or internal system changes.
2. **Error Resolution**:
- Use SPS Commerce’s error handling tools to address failed transactions.
- Work with support if needed.
3. **Expand Functionality**:
- As needed, implement additional documents (e.g., 850, 856) to enhance integration with your trading partner.
---
### Tools & Resources
- **SPS Commerce Documentation**: Reference guides and tutorials.
- **EDI Validator**: To check compliance.
- **Support Team**: Contact SPS Commerce for assistance during setup or troubleshooting.
Would you like detailed examples of specific 810 segments or mapping logic?
Tuesday, September 3, 2024
JSON Validator , URL Encoder/Decoder , URL Parser , HTML Encoder/Decoder , HTML Prettifier/Minifier , Base64 Encoder/Decoder , JSON Prettifier/Minifier, JSON Escaper/Unescaper ,

Comprehensive Utility Tool
URL Encoder/Decoder
URL Parser
HTML Encoder/Decoder
HTML Prettifier/Minifier
Base64 Encoder/Decoder
JSON Prettifier/Minifier
JSON Escaper/Unescaper
JSON Validator
Friday, August 30, 2024
Detailed process of AI System Claims Management

AI-powered claims management systems are transforming the insurance and healthcare industries by automating and optimizing the claims process. Here’s a detailed breakdown of the process involved in AI system claims management:
### 1. **Data Collection and Ingestion**
- **Initial Data Capture**: The system collects all relevant data related to a claim. This includes information from various sources such as claim forms, medical records, invoices, images, and supporting documents.
- **Data Integration**: The system integrates data from different channels, such as emails, electronic health records (EHR), insurance databases, and customer portals. AI can also extract data from unstructured formats like PDFs or images using Optical Character Recognition (OCR).
### 2. **Claim Intake and Triage**
- **Automated Triage**: The AI system classifies and categorizes claims based on severity, complexity, and urgency. It assigns claims to the appropriate workflow or team for further processing.
- **Prioritization**: High-priority claims, such as those involving critical medical conditions or significant financial loss, are flagged for immediate attention.
- **Fraud Detection**: AI models analyze claims for patterns indicative of fraud. This includes checking for inconsistencies in the data, unusual billing patterns, or mismatches with historical data.

### 3. **Data Validation and Verification**
- **Cross-Verification**: The system cross-verifies the claim data against internal databases (e.g., policy details, prior claims history) and external sources (e.g., medical databases, third-party services) to ensure accuracy.
- **Automated Validation**: AI algorithms validate claim details, such as ensuring that the treatment or service claimed is covered under the policy, and that the claim amount is within permissible limits.
- **Anomaly Detection**: The system identifies and flags any anomalies or inconsistencies in the claim data that may require manual review.
### 4. **Claims Processing and Decision Making**
- **Automated Decision Engines**: The AI system uses predefined business rules, machine learning models, and historical data to make decisions on claim approvals, denials, or adjustments.
- **Policy Adherence**: The system ensures that decisions are aligned with policy terms, conditions, and coverage limits.
- **Natural Language Processing (NLP)**: For text-based claims (e.g., medical reports or customer statements), NLP algorithms extract relevant information and insights to aid in decision-making.
### 5. **Claim Adjudication**
- **Automated Adjudication**: Claims that meet all criteria are automatically adjudicated, resulting in faster processing times and reduced manual intervention.
- **Escalation for Review**: Complex or high-value claims, as well as those flagged by the system for potential issues, are escalated for manual review by claims adjusters.
- **Feedback Loop**: The system continuously learns from adjudication outcomes to improve its decision-making accuracy over time.
### 6. **Communication and Customer Interaction**
- **Automated Notifications**: The system generates and sends automated notifications to claimants about the status of their claims, required documentation, and next steps.
- **Chatbots and Virtual Assistants**: AI-powered chatbots provide real-time assistance to claimants, answering questions, guiding them through the claims process, and helping resolve issues.
- **Document Requests**: If additional information is needed, the system can automatically request documents or clarification from the claimant or other involved parties.
### 7. **Payments and Settlement**
- **Payment Processing**: Once a claim is approved, the AI system initiates payment processing, ensuring that the correct amount is disbursed to the right party.
- **Audit Trail**: The system maintains a detailed audit trail of the entire claims process, including decision-making steps, communications, and transactions.
- **Automated Adjustments**: If adjustments to the claim amount are necessary, the system calculates the appropriate adjustments and processes the payment accordingly.

### 8. **Post-Processing and Reporting**
- **Analytics and Reporting**: The system generates detailed reports on claims performance, processing times, payment accuracy, and fraud detection outcomes. These reports provide insights into operational efficiency and areas for improvement.
- **Regulatory Compliance**: AI ensures that all claims are processed in accordance with regulatory requirements. The system can automatically generate the necessary documentation for audits and compliance reviews.
- **Continuous Improvement**: Machine learning models are continuously updated with new data to enhance the accuracy and efficiency of the claims management process.
### 9. **Fraud Detection and Prevention**
- **Predictive Modeling**: AI systems use predictive analytics to identify potential fraud before it happens by analyzing patterns and behaviors associated with fraudulent claims.
- **Real-Time Alerts**: The system generates real-time alerts for suspicious claims, allowing investigators to take prompt action.
- **Machine Learning**: AI models are trained on vast datasets to recognize subtle signs of fraud that may not be apparent to human reviewers.
### 10. **Customer Experience Enhancement**
- **Personalization**: AI systems tailor communications and interactions based on the claimant’s profile, previous interactions, and preferences.
- **Proactive Service**: AI can proactively notify customers of potential issues or opportunities, such as identifying eligible claims that haven’t been filed yet or suggesting preventive measures to avoid future claims.
### Benefits of AI in Claims Management:
- **Efficiency**: AI significantly reduces the time required to process claims, leading to faster settlements and improved customer satisfaction.
- **Accuracy**: Automated validation and decision-making reduce errors and ensure consistent application of policy terms.
- **Cost Savings**: By automating routine tasks and detecting fraud early, AI systems help reduce operational costs and prevent financial losses.
- **Scalability**: AI systems can handle large volumes of claims simultaneously, making them ideal for large insurance companies and healthcare providers.
- **Enhanced Decision-Making**: AI augments human decision-making with data-driven insights, leading to more informed and fair outcomes.
AI-powered claims management systems enhance the efficiency, accuracy, and scalability of the claims process while providing a better experience for both customers and claims adjusters.

Sunday, August 4, 2024
JSON to XML and XML to JSON converter in second . Use it for API integrations and Web development projects

XML to JSON & JSON to XML Converter
XML to JSON
JSON to XML

Saturday, January 20, 2024
What are the steps to follow to integrate VMS with Banks for vendor payment | Amazon | VendorPayments|Walmart|Integration|EDI|B2B|Security
Integrating a vendor management system (VMS) with banks for vendor payment involves several steps to ensure a seamless and secure payment process. Here's a comprehensive overview of the integration process:
Step 1: Define requirements and objectives
Clearly define the objectives of integrating the VMS with banks for vendor payment. Identify the specific payment methods, data exchange formats, and security protocols that need to be supported. This will help in selecting the appropriate integration approach and tools.
Step 2: Select a VMS and bank connectivity solution
Choose a VMS that offers integration capabilities with multiple banks and supports various payment methods. Evaluate the compatibility of the VMS with the bank's payment systems and ensure it meets your specific requirements.
Step 3: Establish data exchange standards
Determine the data exchange standards that will be used for transmitting payment information between the VMS and the bank. Common standards include XML, EDI, and SWIFT. Ensure that both systems can communicate effectively using the chosen standards.
Step 4: Implement data mapping and transformation
Map the data fields in the VMS to the corresponding fields in the bank's payment systems. This may involve data transformation, such as formatting and conversion, to ensure compatibility. Develop data validation rules to ensure data integrity and prevent errors.
Step 5: Configure payment workflows
Define the payment workflows between the VMS and the bank. This includes specifying the authorization process, payment initiation, and reconciliation procedures. Establish clear roles and responsibilities for each step in the workflow.
Step 6: Conduct testing and validation
Perform thorough testing to ensure the integration is functioning as expected. Test various payment scenarios, including single payments, batch payments, and error handling. Validate data accuracy, transaction processing, and communication between the VMS and the bank.
Step 7: Deploy and monitor the integration
Deploy the integrated solution to a production environment and monitor its performance closely. Continuously review and refine the integration to address any issues or optimize the payment process.
Additional considerations for secure integration:
-
Employ strong encryption and authentication mechanisms to protect sensitive payment data.
-
Implement access controls and user authorization to restrict access to payment information based on user roles and permissions
-
Conduct regular security audits and vulnerability assessments to identify and address potential security risks.
-
Follow industry standards and best practices for secure payment processing.

Subscribe to:
Posts (Atom)
-
 Inbound Flow: 1) The inbound, EDI data needs to be collected. 2) The collected data should be De-enveloped (removing the headers) to get t...
 -
Here’s a comparison of the latest IBM Sterling Integrator map editor vs. IBM Transformation Extender (ITX) map editor from a data-mapping p...
-
 Encoding Conversion (From ISO8859_1 / ISO-8859_1 / ISO_8859_1 to UTF8 and vice versa) There is one service called “Encoding Conversion” in...