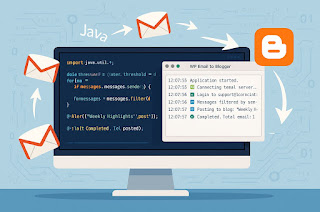
AI prompt : write a bot application using java to take the blog posts from blogger website login and post that blog post in the twitter channel on scheduled base
To create a bot application in Java that retrieves blog posts from Blogger, logs in, and posts those blog posts to a Twitter channel on a scheduled basis, you can follow these steps:
### Overview
1. **Fetch blog posts from Blogger**: Use the Google Blogger API to retrieve blog posts.
2. **Post on Twitter**: Use the Twitter API to post the content.
3. **Schedule the task**: Use a scheduler like `java.util.Timer` or Spring Scheduler to post the blogs at regular intervals.
4. **OAuth Authentication**: Handle OAuth authentication for both Blogger and Twitter.
### Dependencies
To get started, you'll need the following dependencies:
1. **Google Blogger API client**: To interact with Blogger.
2. **Twitter API client**: Use Twitter4J for Twitter API integration.
3. **Scheduler**: Use `java.util.Timer` or Spring for scheduling.
4. **OAuth Libraries**: You’ll need OAuth libraries for both Google and Twitter.
Here’s an example with these steps using Java:
### 1. Add Maven Dependencies
First, add the necessary dependencies to your `pom.xml`:
```xml
<dependencies><br/>
<!-- Google API Client for Blogger --><br/>
<dependency><br/>
<groupId>com.google.api-client</groupId><br/>
<artifactId>google-api-client</artifactId><br/>
<version>1.32.1</version><br/>
</dependency><br/>
<dependency><br/>
<groupId>com.google.apis</groupId><br/>
<artifactId>google-api-services-blogger</artifactId><br/>
<version>v3-rev64-1.25.0</version><br/>
</dependency><br/>
<!-- Twitter4J --><br/>
<dependency><br/>
<groupId>org.twitter4j</groupId><br/>
<artifactId>twitter4j-core</artifactId><br/>
<version>4.0.7</version><br/>
</dependency><br/>
<!-- Spring Framework for scheduling --><br/>
<dependency><br/>
<groupId>org.springframework</groupId><br/>
<artifactId>spring-context</artifactId><br/>
<version>5.3.10</version><br/>
</dependency><br/>
</dependencies><br/>
```<br/>
### 2. Configure OAuth for Google Blogger
You'll need to configure Google OAuth2 to fetch Blogger posts. You can get the credentials from the [Google Developer Console](
https://console.developers.google.com/).
Here’s the code to authenticate and fetch the posts:
```java
import com.google.api.services.blogger.Blogger;
import com.google.api.services.blogger.model.Post;
import com.google.api.services.blogger.model.PostList;
import com.google.api.client.googleapis.auth.oauth2.GoogleCredential;
import com.google.api.client.http.javanet.NetHttpTransport;
import com.google.api.client.json.JsonFactory;
import com.google.api.client.json.jackson2.JacksonFactory;
import java.io.IOException;
import java.util.List;
public class BloggerAPIService {
private static final String APPLICATION_NAME = "BloggerPostBot";
private static final String BLOG_ID = "your-blog-id"; // Replace with your blog ID
private static Blogger bloggerService;
public static Blogger getBloggerService() throws IOException {
if (bloggerService == null) {
GoogleCredential credential = GoogleCredential
.fromStream(new FileInputStream("path/to/your/client_secret.json"))
.createScoped(Collections.singleton("
https://www.googleapis.com/auth/blogger"));
bloggerService = new Blogger.Builder(new NetHttpTransport(), JacksonFactory.getDefaultInstance(), credential)
.setApplicationName(APPLICATION_NAME)
.build();
}
return bloggerService;
}
public static List
getBlogPosts() throws IOException {
Blogger.Posts.List request = getBloggerService().posts().list(BLOG_ID);
PostList posts = request.execute();
return posts.getItems();
}
}
```
### 3. Post Blog Content on Twitter
You will need to configure Twitter OAuth keys (API Key, API Secret Key, Access Token, Access Token Secret) on the [Twitter Developer Platform](https://developer.twitter.com/).
Here’s how you can post the content using Twitter4J:
```java
import twitter4j.Twitter;
import twitter4j.TwitterException;
import twitter4j.TwitterFactory;
import twitter4j.conf.ConfigurationBuilder;
public class TwitterBot {
private static Twitter twitter;
public static Twitter getTwitterInstance() {
if (twitter == null) {
ConfigurationBuilder cb = new ConfigurationBuilder();
cb.setDebugEnabled(true)
.setOAuthConsumerKey("your-consumer-key")
.setOAuthConsumerSecret("your-consumer-secret")
.setOAuthAccessToken("your-access-token")
.setOAuthAccessTokenSecret("your-access-token-secret");
TwitterFactory tf = new TwitterFactory(cb.build());
twitter = tf.getInstance();
}
return twitter;
}
public static void postTweet(String content) {
try {
getTwitterInstance().updateStatus(content);
System.out.println("Successfully posted: " + content);
} catch (TwitterException e) {
e.printStackTrace();
}
}
}
```
### 4. Schedule the Posting
You can use `java.util.Timer` or Spring’s `@Scheduled` to post blogs at regular intervals.
Here’s an example using Spring’s Scheduler:
```java
import org.springframework.scheduling.annotation.Scheduled;
import org.springframework.stereotype.Component;
import java.util.List;
@Component
public class BloggerTwitterScheduler {
@Scheduled(cron = "0 0 * * * *") // Every hour
public void postBlogToTwitter() {
try {
List blogPosts = BloggerAPIService.getBlogPosts();
for (Post post : blogPosts) {
String content = post.getTitle() + "\n" + post.getUrl();
TwitterBot.postTweet(content);
}
} catch (Exception e) {
e.printStackTrace();
}
}
}
```
### 5. Main Class
```java
import org.springframework.boot.SpringApplication;
import org.springframework.boot.autoconfigure.SpringBootApplication;
import org.springframework.context.annotation.ComponentScan;
@SpringBootApplication
@ComponentScan(basePackages = {"your.package.name"})
public class BloggerTwitterBotApplication {
public static void main(String[] args) {
SpringApplication.run(BloggerTwitterBotApplication.class, args);
}
}
```
### 6. Application Properties
Add your application properties in `application.properties`:
```properties
spring.main.web-application-type=none
```
### 7. Running the Application
1. Obtain the necessary OAuth credentials for Google Blogger and Twitter.
2. Run the application, and it will fetch the blog posts and post them on Twitter on a scheduled basis.
---
This is a simplified version. You may want to add error handling, logging, and edge cases (e.g., duplicate posts, scheduling intervals).
LinkedIn Post Link: [Insert your LinkedIn post link here]


